

Hi every body and welcome to part two of this recycling spree that’s continued into February.
I hope you have all had a wonderful Valentine’s day?
In this blog post, I will cover the recycling of papers, plastics and metals from everyday items and help you to turn them into something creative.
Lets dive right in! Below is the list of items I will be covering and their corresponding number and letter to make it easier for you to find the exact arty projects for you.
1. Paper
- Make paper, with paper
- Quilling
- Beads
- Use the beads to then make jewellery, or add to costumes and sewing projects
- Origami
- Collages
- Sculptures
2. Plastic
- Webbing
- Beads
- Plarn
- This can be used for woven outdoor mats and baskets
- Stuffing
- Can be used for plastic bricks.
- Stuffed filling holder
- Shrinky dinks
- This can be used for buttons, charms, keychains and suncatchers.
3. Metals
- Textile art
- Christmas ornaments
- Outdoor tealight holders
- Sculptures
- Jewellery
Paper
1 a. Making paper, with paper
This one has fun, mess and satisfaction all rolled into one.
There are a few things you will need, but they can be improvised.
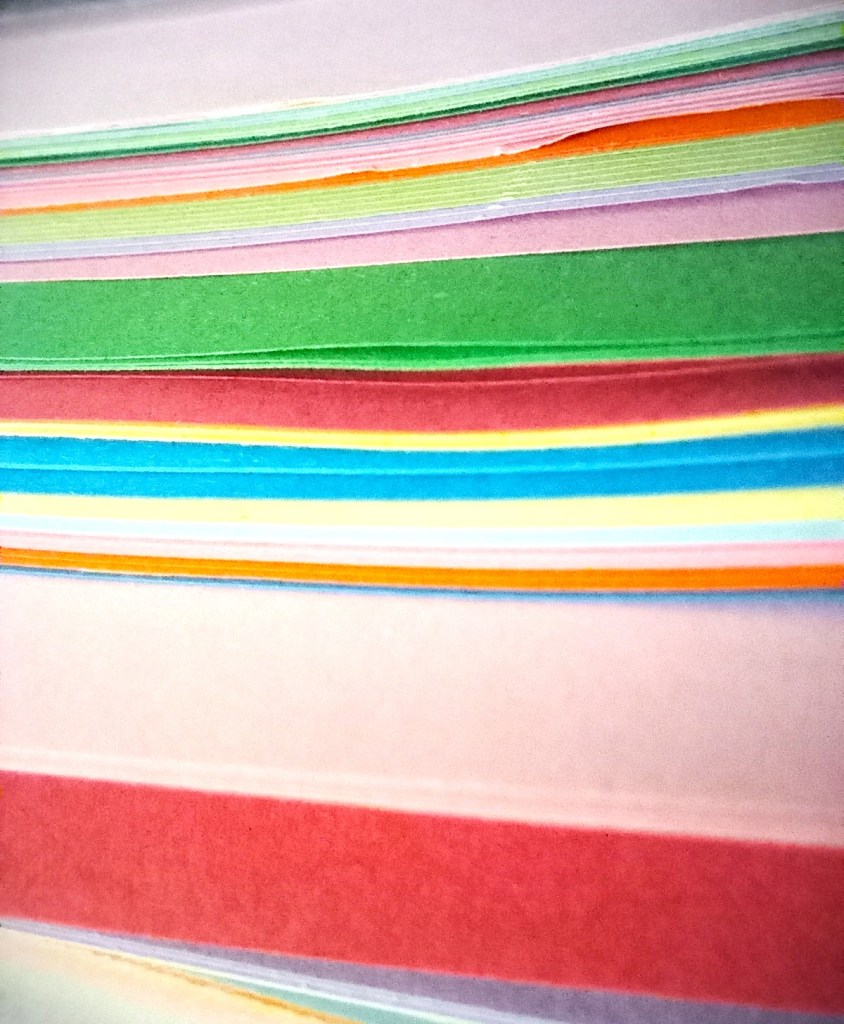
- You will need a big amount of scrap paper, I find that non-shiny and non-waxy paper works best. Think white or brown envelopes (any plastic windows removed), matt coloured or plain paper, matt coloured or plain card.
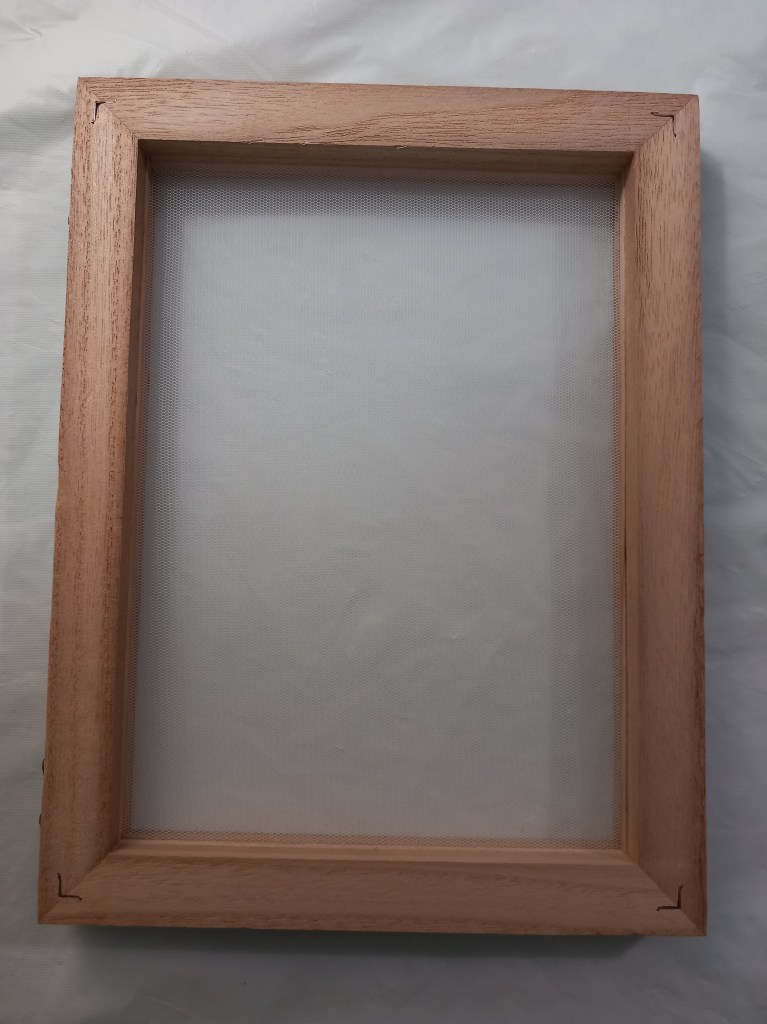
- Mould and deckle (you can improvise with two photo frames and a fine mesh stapled to one)
- Hot Water
- Bucket (wide enough for the mould and deckle)
- Sponge
- Old Towels and Sheets for drying
- Blender or shredder Optional. If using, please make sure it is not used for food. You can tear up the paper by hand.
- Optional additions like dried flower petals, gold leaf, sequins, threads, glitter etc.
Basically, the aim of this is to create a big slush of watery paper and use a sieve to scoop out a thin layer of the watery paper pulp in the shape needed before flipping it out onto a sheet covered towel to dry into new paper.
- To do this, start by either hand shredding your paper into little pieces or using a blender with some torn paper and a bit of hot (not boiling) water so it blends the paper to a watery pulp.
- Grab your bucket and add your paper or watery pulp into it, before adding more hot water. The consistency should be more like water than a paste but you should have enough paper in the mixture so that you can not see the base of the bucket.
- You now have your pulp! easy peasy! Let’s get the drying area ready (bear in mind the paper can take a day or two to fully dry depending how thick you make it and the conditions you’re drying it in). First, fold up the old towels thick enough to catch a good amount of excess water (I’d use a bath towel folded into a quarter), then lay your old sheet on top of the towel – the sheet will act like baking paper does with food in the oven.
- If you’re adding any extras to the paper, you can either add it to the bucket now for a more organic random paper design, or you can be more precise and add it before demoulding your paper in a minute.
- Whirl the pulp in the bucket before grabbing your mould and deckle and lowering it into the mixture. Gently lift it back out and you will see that the mesh in the mould has caught loads of little paper fibers, whilst the deckle (the empty frame part) has kept the fibers contained within the shape.
- Open up the mould and deckle and turn it upside down onto the sheet. Grab a damp sponge and gently use a wiping motion, pressing slightly, across the back of the mesh to release your wet paper onto the sheet.
- When your paper is dry, simply peel it away from the sheet.
Important notes:
If you use lots of paper containing ink, wear gloves and you also might find your paper takes on a slightly grey hue.
You can always re-dunk the mould and deckle into the pulp if your paper isn’t even or if there are missed areas, you can also do this for thicker paper but remember the drying time will be longer.
Some dried flowers will bleed colour into your paper.
Waxy papers and glossy papers, don’t tend to work with this because it doesn’t ‘glue’ itself together very well due to the paper fibers being saturated with wax or chemicals.

1 b. Quilling
You will need:
- Paper
- Scissors or a guillotine
- Glue (hot glue guns work well for quick drying times)
- Card
- Quilling is the art of curling paper strips and attaching them sideways onto a background to create a 3D design. Some designs are really complex and others limit the colour palette or design for a modern aesthetic.
- There are some fabulous artists that use paper quilling as their medium and its also a great way to utilise any long lengths of scrap paper.
- To get started cut your paper into thin strips that are all the same width, you can do this with scissors but it is easier to be more exact with a guillotine. You want them to be about 3 mm but I have used paper that is 1 cm wide and still had great results so this is something you can try yourselves to see what you prefer.
- Set your paper strips to one side and look at mapping out a design on your background. If this is the first time you are trying this, or if you don’t have a lot of scrap paper to work with then I recommend keeping it simple.
- Next, using your mapped out design, take you paper strips and start to gently curl or fold them, edge side down, onto your design using small dots of glue or hot glue as you go along. You want to make sure that there is space between each glued paper strip to create the effect of quilling.
- Leave to dry and there you have it! You can also do this as a sculpture, add it to a box frame to hang on the wall or add it to your artworks.
1 c. Beads
You will need:
- Paper
- Scissors
- Skewer
- PVA Glue
This one is super simple and you can use added bit to create really stunning paper beads.
- First, cut your paper into strips. The width will be dependent on how wide you want your beads to be. You can also, cut long triangles if you want your beads to be thicker in the middle than the edges to give them a rounded appearance. How long you cut your strips and how many strips you use per bead will determine the thickness of your paper beads.
- Next grab you skewer and start to wrap your paper strips around it dotting glue onto the paper as you go to secure it (remember thick end of the triangles first if that is how you’ve cut your paper). As your wrapping it around, make sure that you are not wrapping it to tightly, you will need to slide these off of the skewer at the end.
- Leave to dry enough that the glue is tacky.
- Remove the beads by sliding them off of the skewer.
- Optional extra: you can use clear nail polish to coat the outside of your paper beads to give them a shine and strengthen them if you choose to.
1 d. Origami
The Japanese art of folding paper to create decorative 3D sculptures.
This is a great way to use paper but for some origami designs you may need larger pieces.
There are lots of different designs you can try, one of the most renowned designs is the crane which you can find instructions for online or check your local library for books about origami.
1 e. Collages
This one is pretty self explanatory and you only need your scraps of paper and some glue. Its great for creating mood boards or backgrounds for paint and ink work. I find collecting lots of different scrap papers before diving straight in gives me the most variety of colours and style to work with.
1 f. Sculptures
You can create paper sculptures using one of the above methods or by combining them. Let me know how you decide to use your paper scraps in the comments below.
Plastic
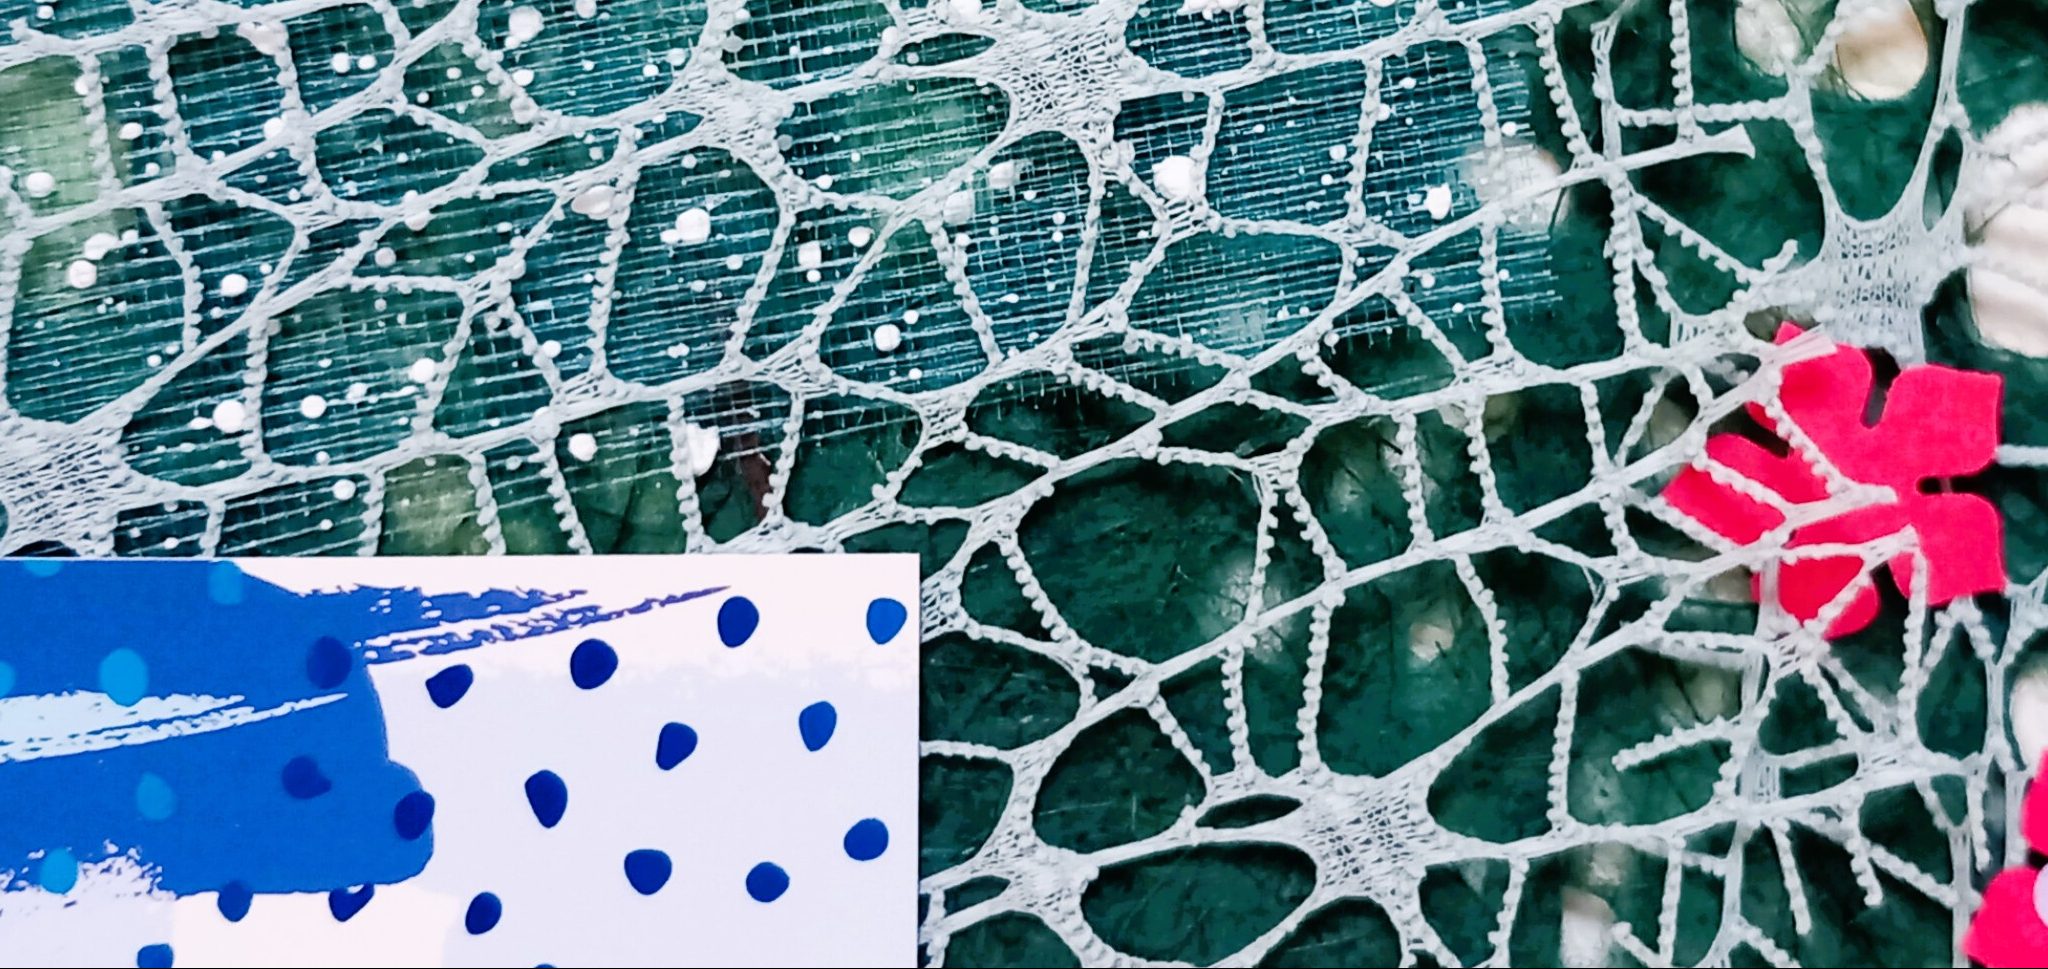
2 a. Webbing
This one is super fun and once you start, you’ll want to make as many different ones as you can because they all turn out different. The aim is to create a web like effect with our plastic bags when the heat shrinks and melts some parts and creates holes in others.
You will need:
- Plastic bag (not the recycled or Compostable ones, I’m talking about the ones that the supermarkets had originally and that some of our packaging for foods and sandwich bags still use.)
- Iron with a low temperature setting – safety first, use caution when in use and always have a responsible adult supervising any children.
- Ironing board
- Baking paper
- Optional: angelina fibers, sequins, glitter, small paper scraps, threads.
- Start by setting up your ironing board and iron to a low heat setting, it shouldn’t need to be super hot for this.
- Make sure you have lots of baking paper to hand, you’ll want to put a layer of baking paper on the ironing board so plastic doesn’t melt onto the board.
- Next, grab your plastic bag and place it onto the baking paper, make sure that none of the bag touches the ironing board.
- if you want to use your optional items, now is the time to place them inside the bag, spread them out so that plastic space surrounds them as best as you can.
- Now, you should put a final layer of baking paper on top of your plastic bag. Effectively, it should look like a baking paper sandwich with the plastic bag and optional extras being the filling.
- Once your iron is up to heat, gently sweep it across the surface of the baking paper. It shouldn’t take too long for you to feel the plastic bag shrinking underneath. Make sure your iron never touches any part of the plastic bag directly – it will melt onto your iron, nobody wants that mess or smell.
- Finally, remove the top layer of baking paper, if you feel like it needs more shrinkage, then replace the baking paper and use the iron again on top, you can also increase the heat slightly but it works best low and slow I find.
congratulations! you have created webbing, now go forth and try all the colours of plastic bags and things to trap inside them. Side note: this is great with black bin bags as huge webs for Halloween, you’re welcome.
2 b. Beads
Webbing leads me nicely onto beads, you will need the same supplies plus a skewer.
Its also the same process, except instead of sandwiching the plastic bag flat between bits of baking paper, you just wrap it around the skewer first instead, then sandwich the plastic covered skewer. You might need to lift the baking paper, turn the skewer and then replace it again so that the bead has chance to melt all the way around the skewer but its the same principle.
I’ve tried this method with trapping too and it works well so long as there is enough plastic surrounding the trapped items to ensure the layers of plastic don’t lift and unravel.
2 c. Plarn
Plarn or Plastic-Yarn is a great way to use up plastic bags and there’s a few outdoor uses for it too.
You will need:
- Plastic bags
- Scissors
Use this cutting guide to give you a continuous piece of plarn from one bag. If you struggle with the images, there are lots of videos on YouTube detailing how to create this. Once you’ve cut it out, you can use it for crochet, knitting and macrame especially for outdoor use (its best to use non compostable bags for outdoor use)


Once you’ve made these cuts, ravel it all up into your own plarn ball. If you use more than one plastic bag, just join them together with knots.
2.d & e Stuffing and Stuffing Holder
I plonked these two together because they really go hand in hand.
Imagine you’ve made a gorgeous outdoor plarn decoration using the above technique, but, it needs something to fill the inside to keep its shape. You cant use rice like you would indoors, that would swell and end up a big mess with the first lot of rain. Just use a plastic bags! There’s also a really cool use for them with plastic bricks – There’s a few places that have been stuffing 2 ltr bottles to the brim with plastic bags and then using the stuffed bottles to build small garden walls etc just like bricks. It’s worth a look into especially if you’re adamant on creating as little waste as possible.
Now, Imagine you’ve just sewn together a lovely indoor door stop and you want to fill it with rice to hold its shape and keep it heavy enough to hold a door open – but you don’t want to just pour the rice straight into your material! what if it needs washing later down the line, or what if it a seam rips when the hoover gets a bit too close?! Well, just use a plastic bags to hold your rice. pour the rice into your plastic bag, tie it up and stuff it into your item before closing up the seam with Velcro or a zip.
2 f. Shrinky Dinks
Caution: This only works with NUMBER 6 PLASTIC. Other plastics may be toxic if heated. Check for a number 6 within the recycling logo to ensure you have the right plastic first.

You will need:
- Flat pieces of number 6 plastic
- An oven – always be careful when in use and always have a responsible adult present when children are involved.
- Baking tray
- Baking paper
- Pens (Sharpie or similar)
- skewer or knife
This is one where you can play around with your designs and you can watch them change before your eyes, its super fun.
- First after checking you have only the number 6 plastics to hand, pop your oven on to preheat you want the temperature to be around 175 degrees Celsius.
- Prep your baking tray with some baking paper ready for your shrinky dinks.
- Next, start drawing your designs onto the plastic.
- Once the oven is to temperature, place your designs onto your prepped baking tray and pop it into the oven.
- Keep a close eye on the plastic pieces, you will see that they start to shrivel and some might curl. If this is the case, they will sometimes flatten themselves back out but if they don’t seem to be flattening, you can use your skewer or knife to carefully uncurl it from itself.
- once they have shrunk and are no longer curled up, remove from the oven and allow them to cool before handling them.
- you might find some of your designs don’t shrink evenly and this can be due to the manufacturing of the plastic but it will definitely give you a custom piece that can be used as a jewellery charm, key ring or greetings card addition.

Metals
3 a & b. Textile Art and Christmas Ornaments
I have made a blog post about metal techniques previously here. I think it covers a fair amount about how to work with thin metal when designing for use with textile art and Christmas ornaments but I haven’t covered outdoor tea light holders, sculptures and jewellery yet.
3 c. Outdoor Tealight Holders
This one is super simple and all you will need is:
- A clean food tin
- Awl or an old screwdriver or drill
- Thick safety gloves
- Optional: Metal wire that long enough and thick enough to hang the tin.
For this one its basically creating multiple holes around the sides of the tin, and one in the bottom for any rain to drain out. It doesn’t look like much to start with, but once you have a few dotted around the garden in the evening and there’s little sparkling lights dancing around the garden, its truly magical.
All you need to do is use a bit of brute force to pierce the holes and make sure you do this as safely as possible. Its best to wear thick safety gloves when doing this to avoid any injuries especially if you’re using a sharp awl. If you want the tealight holder to hang up, just make two extra holes near the top rim opposite of each other and tie your metal wire through.
FIRE SAFETY: do not burn any candles near anything flammable like wooden fences, furniture and dry grass – if you are concerned about real flames but still want a cosy feel, there are solar lights and fake candles available for reasonable prices. I also strongly urge the use of solar lights or fake candles instead of real tealights if you have children or pets around.
3 d. Sculptures
See what I did there when listing sculpture under 3 d? heh. It’s the little things!
Anyway, sculptures especially metal ones can take all shapes and forms, this one is best done when just having a bit of a go. There’s lots of inspiration around, I remember seeing an artist who was making entire animal sculptures just from metal found in the cutlery draw! There was another chap on TV from a while back, he was making lamp stands from welded chains, it looked impossible and incredible. You can even give wire sculptures a go, do you have any chicken wire laying around? that stuff is perfect for making ghostly sculptures which are even better when lit up at night. Give it a go and send us your results in the comments.
3 e. Jewellery
Last but not least, jewellery! I’ve already covered some paper and plastic bead making and shrinky dink charms in this blog but you’re going to need something to put those beads on to – here comes metal wires time to shine.
So I get it, nobody wants plain old wire cutting into their wrist, but what if you do the “scoobie” bracelet knotting all of us 80’s and 90’s kids did at school and turn it into a braided wire. Its a little extra effort for a really nice reward.
Let me know which crafts you decide to take on from this blog post, or if it inspired you to create anything new.
Overall, we all know it’s really important to recycle as much as we can so why not do it creatively? I’d love to see your creative works and if there’s any other creative recycling tips or ideas you can share then feel free to add them in the comments below.
I hope you all have a wonderful weekend!
Abigail xo

Leave a comment