

Hello again everyone! Are you looking for something different to add to your work or perhaps you want to brush up on some embroidery skills? – I gottchu!
For this blog post, I thought it would be a great idea to go over the most used embroidery techniques in my own art. These are the methods I use ALL the time, but there are plenty more – fun fact, did you know embroidery is thought to date back to the 3rd century BC?! There are literal fossilized embroidery samples that old in existence. Incredible!
Maybe you’re a pro and are already familiar with each method, or maybe you haven’t tried them yet and you’d like to give them a go, so here they are – I’ll name them, describe what they are and show you a little example of each one. There are many more embroidery stitches in existence than these listed, so if there are any in particular you’d like me to cover then please let me know and there are also lots of great resources online for embroidery that are free and readily available (my go to used to be Pinterest, I should really go check that out again soon, I miss it!) Also, let me know how you get on with these stitches and if they have come in useful for any of your projects, they aren’t just limited to textiles after all.
Starting off your embroidery stitches
Before we get to the actual stitches, its worth noting that I don’t tie my thread in a knot at the end before starting my stitching typically because I work with roving I have felted quite thickly then I can pull my threaded needle through the middle of the projects a few times to secure it before stitching. But, if you are working with thinner fabrics or other materials, you should use the best method to secure your thread first and that might well be a knot at the end of your thread, glue, tape or multiple “pre-stitches”. For the explanations below, I have continued on from the point where your thread is secured to your work.
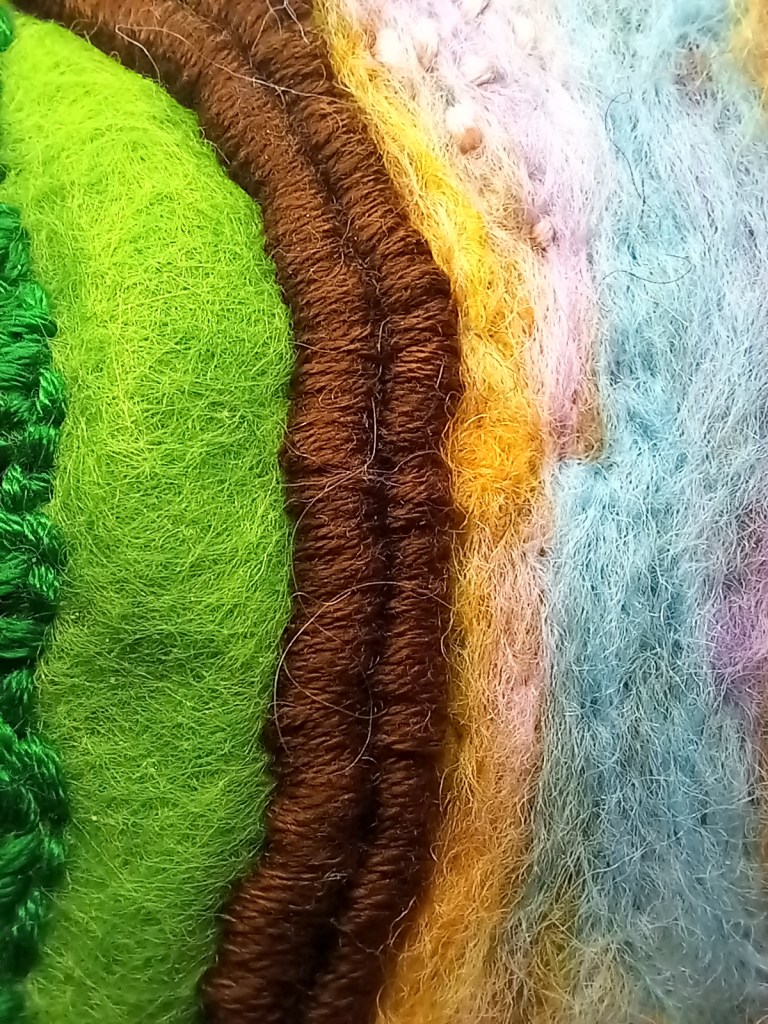
1. Trapping
What is it?
Trapping is basically using your thread to ‘trap’ an object against your material.
This type of embroidery can be used for mixed media art, textiles, costume and even metalwork (using wire instead of thread) so this stitch is incredibly handy and fairly simple depending on what item you’ve chosen.
How can I do it?
I typically use things like the foam fruit packaging and break it down into strips to trap (see examples below).
- Using a threaded needle, I stab it into the material on one side of the foam.
- Guide it under the material and bring it up on the other side of the foam.
- Wrap it over the foam and stab it a little further along and repeat. I continue until all of the foam is neatly wrapped or “trapped” into place onto the material.
You can experiment with trapping different items, another common one to use are beads and toy stuffing (basically anything that is slightly raised will work but the items and thread you use may give differing results like the thread not covering the entire item if its raised points are too steep.)
You can also experiment with threads, wool, rope and glitter strands (readily available around the Christmas periods). Let us know how you get on and what the results look like in the comments below.


Helpful Tip for Trapping
If you are having trouble holding your items in place whilst using the trapping method, try pinning it or using scrap thread to tack it in place, just make sure to use a different colour for your scrap thread tacks so you can see them if you need to remove them. If you are doing this method for mixed media pieces of costumes, you could even try a hot glue gun to hold it whilst stitching.
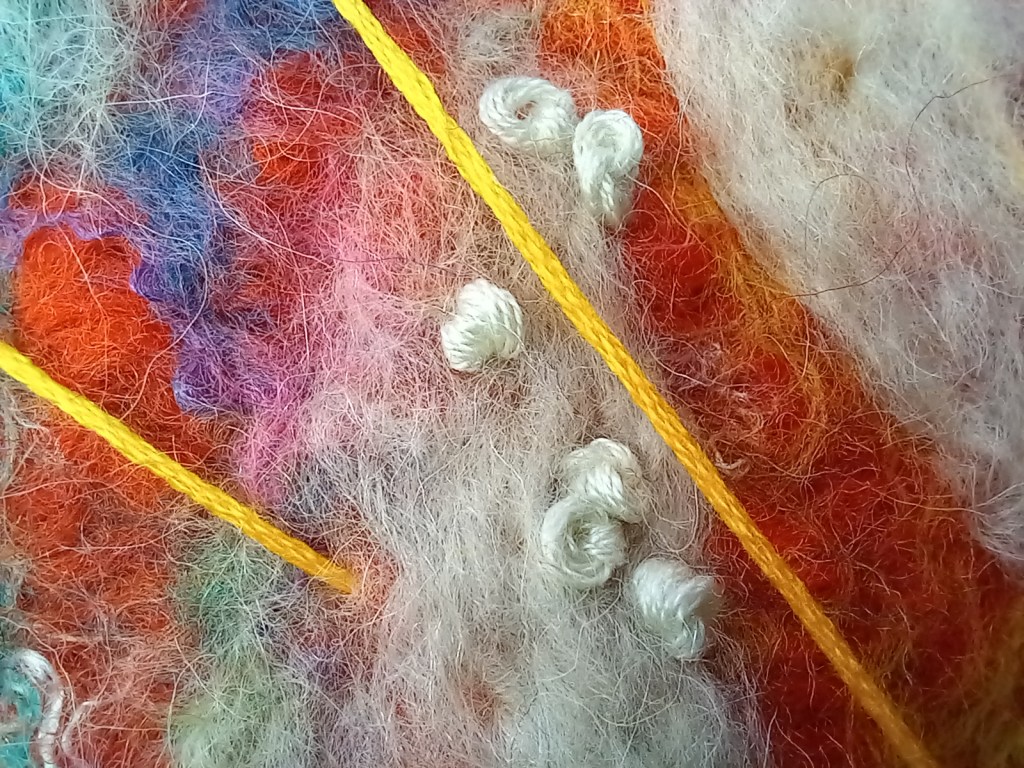
2. French Knot
What is it?
This stitch is a controlled knot that creates great texture in any embroidery piece. Its usually used for flowers or for texture alongside beading.
I would suppose this could also work with a thin wire for metal sculptures or jewellery making – have you tried it? let me know in the comments below.
How can I do it?
- Bring the thread up through to the front of your project, wrap the thread around the needle a few times (the more you wrap the chunkier the knot but also the more difficult it is to do neatly) I tend to go for three full wraps.
- Keep these wraps slightly taught on the needle, you don’t want them falling off but you also don’t want them so tight that the eye of the needle cant pass through them.
- Once wrapped, and holding the wraps on, push the needle down into the material near to where you brought it up. If its your first time doing this stitch, don’t expect it to be perfect, this is a tricky one and practice is definitely required.


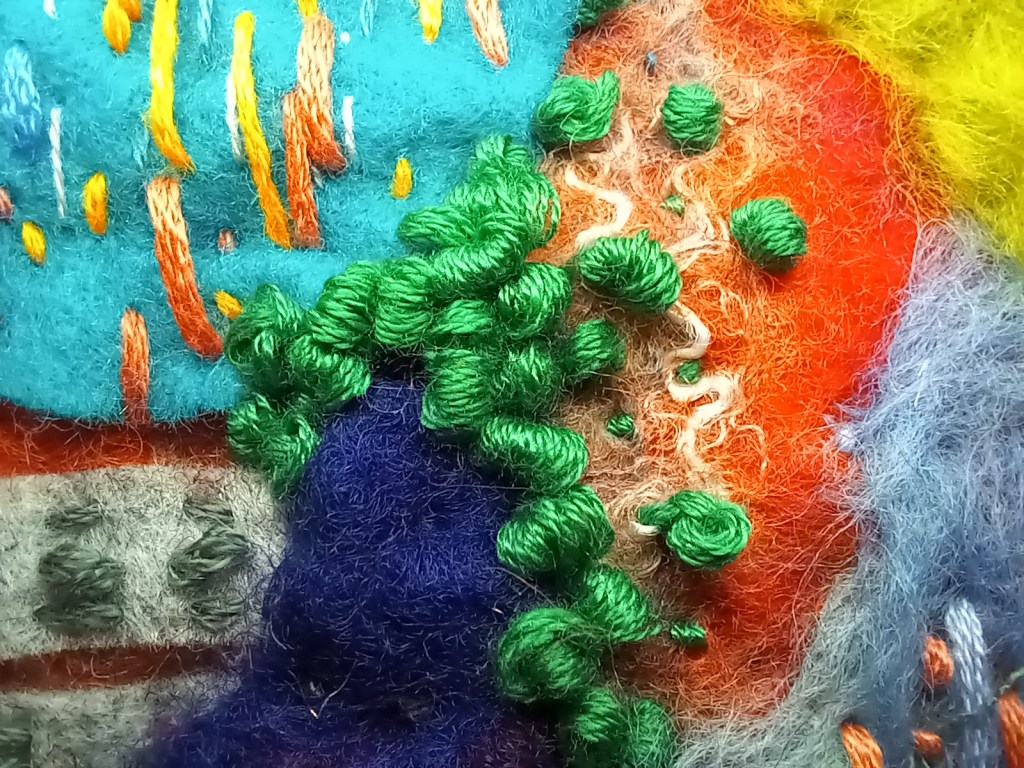

Helpful tips for creating French Knots
This is one of the more difficult stitches for beginners because they will feel like they have to have seven pairs of hands to make sure all the wraps stay on the needle whilst pushing it through and keeping the knot in position.
The best advice I can give is, as the needle has gone through the material, put your non dominant hands’ thumb over the wraps it leaves behind (where the needle has just been) as you pull the rest of the thread through. This will help stop any tangles from twisted threads and give you more control of the knots neatness and position.
3. Running Stitch
What is it?
This is a continuous forward moving thread that weaves in and out of the material.
It’s the basic stitch and is great for attaching pieces quickly, adding texture or tacking. I have used this during a metalwork class, almost a decade ago – cough- I feel so old -cough-, to join together pieces of punched metal sheets using a wire.
How can I do it?
This one is super simple and its probably the stitch most beginners will already know.
- You grab your threaded needle and push it up through the material move it along a set distance from where the thread came up and push it back down.
- Then, bring it back up the same set distance away from where you pushed it through, and repeat. Its one of the fastest stitches you can do.


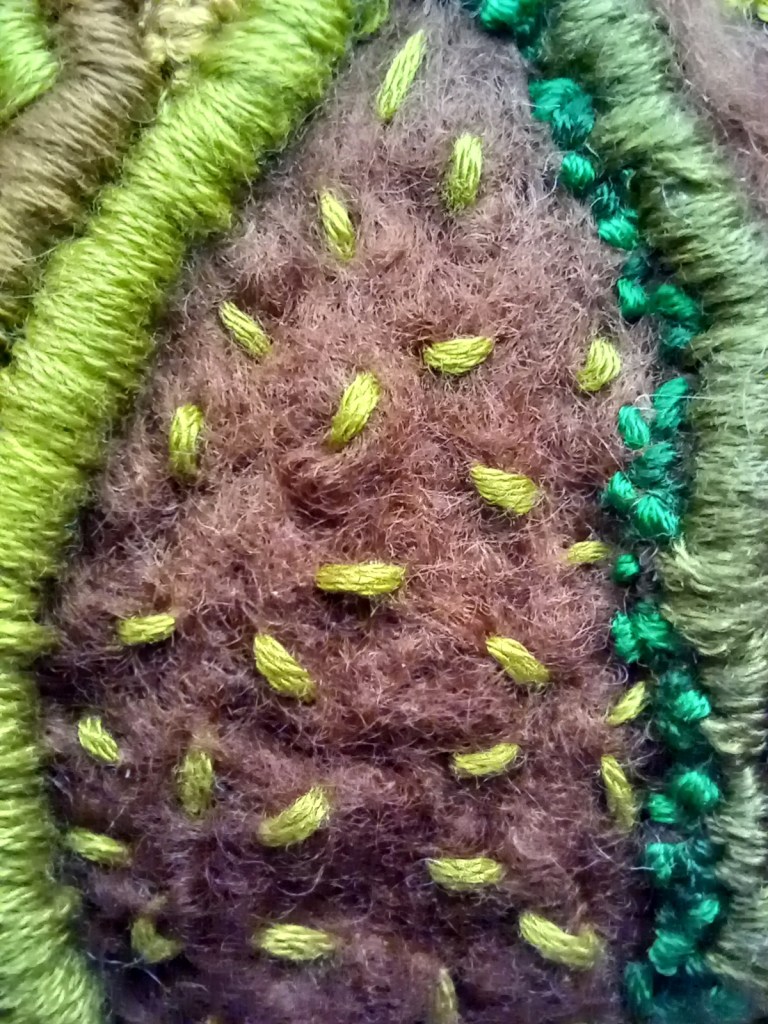
4. Seed Stitch
What is it?
It’s like the above running stitch, but without set spaces. Seed stitches are a great way to embroider texture without it being too 3D (French knots, I’m looking at you!) as well as giving interest. It’s also a great way to depict abstract grasses, straw and plant growth or built up with different colours to give a painterly appearance.
How can I do it?
- Bring your threaded needle up through your work and place it down through the fabric again where you want your stitch to be.
- Bring it Back up through your work again away from the last stitch and repeat. Typically the length of stitches will be the same but where you bring your needle back up is more loose or random, yet, you can change the length of your stitch too to create different effects- see the examples below.


Now these are the few stitches I have used recently on my new upcoming series (release date tbc) but you can see them in some of my earlier work on the gallery here or on my Etsy store here.
If you’re struggling for ideas on where to use them why not try one of these:
- Advent Stitch Calendar (One miniature stitched image each day from the 1st December on the run up to Christmas, it’s definitely less calories than chocolate and will keep your hands busy!… and by the end of the month you’ll be a pro.)
- Cross-Stitch style artwork (you can create a piece of art for your home or for a loved one, it doesn’t even have to be huge but you can frame it like cross stitch pieces are)
- Try these stitches using recycled materials and note what works and what doesn’t, you’ll be saving the planet one tiny piece at a time whilst learning and crafting.
- Are you a costume maker, jewellery designer or metal worker? try incorporating these stitches into your work and see how well they can be used with the materials you have.
Most of all, enjoy yourselves and let me know if you have managed to have a go or what you can use these for in the comments below. Have you managed your embroidery journey without any hiccups? or did you fall in a tangle of embroidery threads on the floor laugh crying into the abyss? (we’ve all been there, haven’t we?)
Also, don’t forget to hit like and sign up for future newsletters if you’re interested in my blog – I won’t ever spam you, I will only ever send you my blog posts which run about once a month and are all craft based with lots of helpful ideas and tips.
Until the next post, Abigail x

Leave a reply to Creative Recycling Ideas for Scrap Wool and Threads – AbigailsArtwork Cancel reply